
Uniforms
When we want to send our shader a small amount of data to a shader we can use uniforms which are a quick and easy way to send data. Uniforms are usually a single float, vec3, mat4 and similar
In the beginning we are going to be using uniforms to set the color of a triangle or to set a triangle’s transform
Uniforms can also be an array of variables which can be useful for example when having multiple light sources and passing their position, color and strength to a shader
In GLSL uniform are used like in the following example
uniform vec3 color;

int main()
{
    FragColor = vec4(color.x, color.y, color.z, 1.0f);
}In C/C++ we can set the uniform of the shader by writing
// GLuint ShaderID = shader program we want to set the uniform for

glm::vec3 color = glm::vec3(0.8f, 0.2f, 0.3f);

GLint location = glGetUniformLocation(ShaderID, "color");

if(location == -1) {
    // error: location for "color" was not found
    return;
}

glUniform3fv(location, 1, &color[0]);
When setting a shader uniform each available data type has its own function. We have functions like glUniform3fv(..), glUniformMatrix4fv(..), glUniform1i(..) and so on. As you can see the macro names have a naming convention describing what are we going to send. For example glUniform1i means that we will be sending a single (1) integer (i)
When using a data type with several values like glm::mat4 or glm::vec3 we need to pass a pointe r to the first value. This means that for glm::vec3 we will be passing &vector[0]
Caching uniform location
Instead of fetching the location of a uniform each time we want to set it we can cache it inside a variable and use the cached location each time we want to access the uniform instead of calling glGetUniformLocation(...) every time
The location of any uniform does not change during the shader program’s lifetime
// GLuint ShaderID  = ...;
// double deltaTime = ...;

double time = 0;

GLint location = glGetUniformLocation(ShaderID, "color");

while(!glfwWindowShouldClose(window)){
    time += deltaTime; // Delta time will be explained a bit later

    glm::vec3 color;
    color.r = sin(time);
    color.g = sin(time * 1.4f);
    color.b = sin(time * 1.8f);

    glUniform3fv(location, 1, &color[0]);
}
Rotating a triangle
As seen in the vectors and matrices chapter we can make a 4D matrix that rotates (or otherwise transforms) vertices. We can generate one just like
// GLuint ShaderID = shader program we want to set the uniform for

glm::vec3 trianglePosition = glm::vec3(0.5f, 0.3f, 0.2f);

glm::mat4 transform = glm::mat4(1.0f);
transform = glm::rotate(transform, glm::radians(25.0f), glm::vec3(0.1f, 1.0f, 0.4f));

GLint location = glGetUniformLocation(ShaderID, "transform");
glUniformMatrix4fv(location, 1, GL_FALSE, &transform[0][0]);
And our vertex shader will look like
layout (location = 0) in vec3 position;
uniform mat4 transform;

void main()
{
    gl_Position = transform * vec4(position.xyz, 1.0);
}The shader program will keep the transform stored inside of it. To update it we need to send a new transform to the shader program with glUniformMatrix4fv. We should update the uniform when the value of a uniform changes in our C/C++ program and we do not need to set it again even after rebinding shaders. However if we change the uniform for example for a different object the uniform is again rewritten and we need to send the uniform of our first object again when rendering it even if it did not change in C/C++
If we change the angle of the transform and send it repeatedly once per frame to the triangle rendering shader the result should look like
Later on when rendering a full object we would want to store the position, rotation and scale for all our objects and update the shader uniform for each object rendered
The transform only serves to move the triangle to its world space position. If we want to make a camera and move it more based on our camera position/rotation we use a second different transform
Delta time
Delta time is a variable that tells us how much time was spent between the last two frames. Let’s say we want to move our triangle up by a certain amount. Right now we would put something like this in our game loop that runs every frame
glm::vec3 trianglePos = glm::vec3(2.0f, 1.0f, -3.0f);
glm::vec3 up = glm::vec3(0.0f, 1.0f, 0.0f);

while(!glfwWindowShouldClose(window)){
    trianglePos += up;

    // Other per-frame stuff
}
But imagine that normally we have 60FPS (frames per second). This means that the code above runs 60 times every second meaning we move by (0, 1, 0) 60 times so by 60 every second. Now let’s say our FPS went lower or that our game is running on a slower machine and now we are only getting 20FPS. The code moving our triangle up thus only runs 20 times per second so we move by (0, 1, 0) 20 times meaning we move by 20 every second
This is obviously not ideal as that means that our camera, player and objects will move and rotate unreliably. A player on a very good computer might move so fast the game becomes unplayable and a player with a very bad computer might move so slow it also becomes unplayable
This is why we have delta time. If we have 1 FPS our delta time will equal 1 as it took 1 second between frames. Now if we have 2 FPS our delta time will be equal 0.5 as it took half a second to complete each frame and so on
Now if we use our delta time with the up vector to move up by multiplying them our results will look like
| FPS | delta time | calculation | movement per frame | frames needed to move by 1 |
|---|---|---|---|---|
| 1 | 1 | (0, 1, 0) * 1 | (0, 1, 0) | 1 |
| 2 | 0.5 | (0, 1, 0) * 0.5 | (0, 0.5, 0) | 2 |
| 60 | 0.01666 | (0, 1, 0) * 0.1666 | (0, 0.1666, 0) | 60 |
When using delta time our movement suddenly becomes slower and we need to account for that. If we did not use delta time before our movement moved us by around 60 depending on FPS but now we always move by 1 per second which is 60 times slower. If we still want to move by 60 per second we should write our code as
// double deltaTime = ...;

glm::vec3 trianglePos = glm::vec3(2.0f, 1.0f, -3.0f);
glm::vec3 up = glm::vec3(0.0f, 1.0f, 0.0f);

while(!glfwWindowShouldClose(window)){
    trianglePos += up * 60.0f * deltaTime;

    // Other per-frame stuff
}
The code above is no longer FPS dependant and will result in the same movement no matter our FPS. This is perfect for any movement, rotation or time dependant value change like a timer
FPS and delta time can be calculated from the other one as 1/FPS = delta time and 1/delta time = FPS
Calculating delta time
Calculating delta time is pretty simple and only needs to be done at the start of each frame. We just take the time from the previous frame and current frame and get the difference between the two. GLFW has a function that tells us time as a double making calculating delta time easy
double previousFrame = 0;
double deltaTime;

while(!glfwWindowShouldClose(window)){
    double currentFrame = glfwGetTime();
    deltaTime = currentFrame - previousFrame;
    previousFrame = currentFrame;

    // std::cout << "deltaTime: " << deltaTime << std::endl;
    // std::cout << "FPS: " <<  1.0f/deltaTime << std::endl;

    // Other per-frame stuff
}
Making a camera
A camera consists of two matrices called view and projection. View consists of the camera position and rotation and projection has the camera projection matrix
View
A view is generated similar to an object transform by generating an identity matrix and moving rotating it
Just like in real life if we move a camera to the left everything from the camera’s POV moves to the right. We can do that by negating all our camera coordinates and angles. If our camera is at x=3 the camera view will have x=-3
glm::vec3 cameraPosition = glm::vec3(1.0f, 0.5f, -0.2f);

glm::mat4 view = glm::mat4(1.0f);
view = glm::translate(view, -cameraPosition); // notice the minus sign next to cameraPosition
Of course we want to also rotate our camera. Luckily GLM provides us glm::lookAt(..) with 3 argument. First argument is where is a position to where are we looking from, the second argument is where are we looking to and the third one is a direction which will work as up and will point directly above us
const glm::vec3 worldUp = glm::vec3(0.0f, 0.0f, 1.0f);

glm::vec3 cameraPosition = glm::vec3(1.0f, 0.5f, -0.2f);
float yawDeg = 25.0f;
float pitchDeg = 10.0f;

// calculate radians from degrees
float yaw   = glm::radians(yawDeg);
float pitch = glm::radians(pitchDeg);

// Get forward direction using yaw and pitch
glm::vec3 forward;
forward.x = cos(yaw) * cos(pitch);
forward.y = sin(pitch);
forward.z = sin(yaw) * cos(pitch);
forward = glm::normalize(forward);

// Generate a view matrix
glm::mat4 view = glm::lookAt(cameraPosition, cameraPosition + forward, worldUp);
When we make our camera as above we can see that we have no limit to how much we can look up or down to the point where we can rotate so far that we start to see our world from behind. This is not what we want most of the time so we need to lock our pitch before calculating the forward direction
// we can look only from -89.0 degrees to 89.0 degrees
constexpr float maxPitch = 89.0f;

if(pitchDeg > maxPitch)  pitch = maxPitch;
if(pitchDeg < -maxPitch) pitch = -maxPitch;
Linking the view with input
This is the part were we probably want to connect our input system with the rest of our program so we can move and look around our scene. It is as simple as modifying the camera position vector based on keys pressed and setting the camera pitch and yaw based on delta mouse movement
Keyboard movement
When processing the input we may want to create a vector defining the movement that will be processed this frame. The pseudo code below showcases how to create such movement vector
// double deltaTime = ...;
// glm::vec3 cameraPosition = ...;

constexpr float movementSpeed = 2.0f;

glm::vec3 movementVector = glm::vec3(0.0f);
if(moveForward) movementVector.z += 1.0f;
if(moveBack)    movementVector.z -= 1.0f;
if(moveLeft)    movementVector.x -= 1.0f;
if(moveRight)   movementVector.x += 1.0f;

if(moveUp)      movementVector.y += 1.0f;
if(moveDown)    movementVector.y -= 1.0f;

cameraPosition += movementVector * movementSpeed * deltaTime;
Mouse movement
The next thing is implementing the camera rotation using the mouse. We are again going to create a vector representing the roll and pitch of the camera
// double deltaTime     = ...;
// glm::vec2 deltaMouse = ...;

// float yawDeg   = ...;
// float pitchDeg = ...;

constexpr double mouseSensitivity = 2.0f;

glm::vec2 deltaCameraRotation = deltaMouse * mouseSensitivity * deltaTime;

yawDeg   += deltaCameraRotation.x;
pitchDeg += deltaCameraRotation.y;
Before using the mouse for rotating the camera we should disable the mouse cursor as seen in the input processing chapter
glfwSetInputMode(window, GLFW_CURSOR, GLFW_CURSOR_DISABLED);Keyboard movement based on camera rotation
If we use the current keyboard movement and camera movement we will notice how the keyboard movement don’t translate well with how the camera is rotated. We are moving strictly along the X, Y and Z axis as if we were looking directly forward no matter where we look
After we create the movementVector but before adding it to cameraPosition we should translate it based on the camera rotation
// glm::vec3 worldUp = glm::vec3(0.0f, 1.0f, 0.0f);
// glm::vec3 forward = ...; // <- forward direction of the camera

// glm::vec3 movementVector = ...; // <- from our input

glm::vec3 right = glm::normalize(glm::cross(Front, worldUp));

movementVector = forward * movementVector.y + right * movementVector.x + movementVector.z * worldUp;
movementVector = glm::normalize(movementVector);

// cameraPosition = ...;
After adding the code above to the movement code moving forward will no longer move us strictly along the Z axis but moves us forward based on the angle of the camera
Projection
The second transform for our camera is the projection transform. It specifies how is the scene projected onto our screen
We have two types of projection
- Orthographic
- Perspective
We only need to update the projection matrix each time the window resizes as both perspective and orthographic projections take window width and window height. When no window resize happens we can just reuse the previous projection transform
Near/Far plane
The near plane specifies the minimum distance from the camera that will not be rendered. Anything closer than the near plane will be invisible
The far plane specifies the maximum distance from the camera that will not be rendered. Anything further than the far plane will be invisible
Both of these values are to specify the depth buffers minimum and maximum range which can be mapped onto the float values in the depth buffer texture
For now we can use the values 0.1f and 500.0f as these are fairly standard values however based on your setup you can tweak these values. We do not want to set the range between these values too far as it can lead to floating point precision errors which lead to z-fighting
Perspective projection
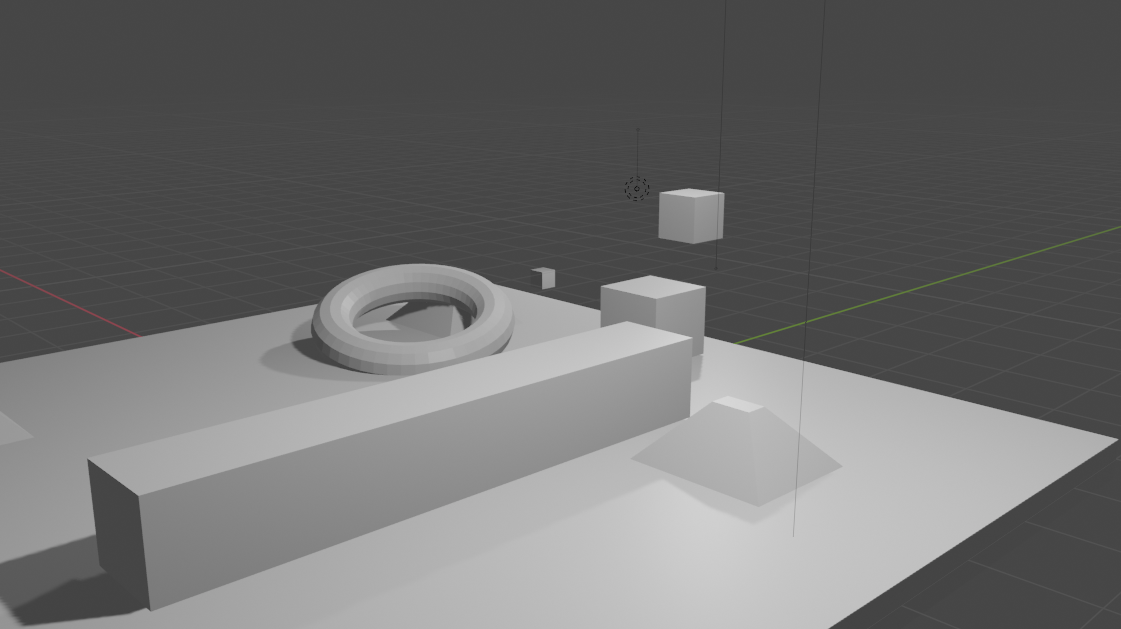
Perspective projection is the more commonly used one. It distorts objects in the distance making them appear smaller. The projection area is a cone shape
// float screenWidth;
// float screenHeight;

constexpr float nearPlane = 0.1f;
constexpr float farPlane  = 500.0f;
float FOV = 90.0f;
float aspectRatio = screenWidth / screenHeight;

glm::mat4 projection = glm::perspective(glm::radians(FOV), aspectRatio, nearPlane, farPlane); Orthographic projection
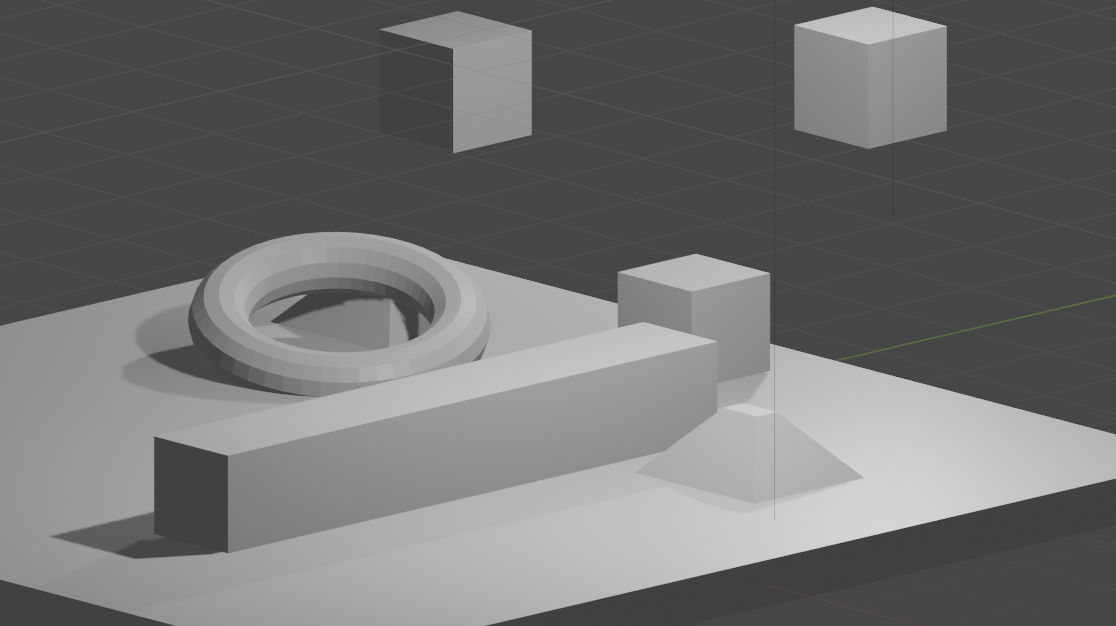
Orthographic projection does not distort the projected objects in distance. The projection area resembles a box shape
// float screenWidth;
// float screenHeight;

constexpr float nearPlane = 0.1f;
constexpr float farPlane  = 500.0f;

glm::mat4 projection = glm::ortho(0.0f, screenWidth, 0.0f, screenHeight, nearPlane, farPlane);
Combining everything together
The view and projection is now enough to move the objects with the camera. We can send both of these matrices to each shader and let them combine together and afterwards move vertices with them or we can combine them before sending just a single matrix
Without combining them the shader may look as
// Vertex shader

layout (location = 0) in vec3 pos;

// Transform from the previous chapters
uniform mat4 transform;

// Camera matrices
uniform mat4 projection;
uniform mat4 view;

void main()
{
    mat4 combinedMatrix = projection * view * transform;
    gl_Position = combinedMatrix * vec4(pos.xyz, 1.0);
}
Another approach is combining the projection and view on the CPU so that we do not have to send both matrices and calculate them for each shader/vertex
// GLuint ShaderID = ...;

// glm::mat4 view = ...;
// glm::mat4 projection = ...;

glm::mat4 camera = projection * view;

GLint location = glGetUniformLocation(ShaderID, "camera");
glUniformMatrix4fv(location, 1, GL_FALSE, &camera[0][0]);// Vertex shader
layout (location = 0) in vec3 pos;
uniform mat4 transform;
uniform mat4 camera;
void main()
{
mat4 combinedMatrix = camera * transform;
gl_Position = combinedMatrix * vec4(pos.xyz, 1.0);
}